

CoF Farming Guide (EotN) (u c.)
Shadow of Gods :: Guild Wars 1 :: In-Game :: PvE :: Farming
Page 1 of 1
![]()
 CoF Farming Guide (EotN) (u c.)
![]() by Ayumi Nakashi Sat Apr 12, 2008 3:17 pm
by Ayumi Nakashi Sat Apr 12, 2008 3:17 pm
Hello everybody reading this topic.. 
I've decided to make a Cathedral of flames guide on how to farm this Dungeon.
I'll bring up things like the builds, pictures, and other stuff so all of us would be able to farm this place.
And also earn some extra cash by taking along other players.. (you can easily ask 1,5k - 2k a person)
6x1,5k =9k
6x2k = 12k
Just for taking the people along
When planning on going solo, you can expect to get around 5-8k a run. Including the 1,5k mission reward you can collect at the merchant *Gron Fierceclaw*. From him you should also get the mission called *Temple of the Damned*

!!ALWAYS be sure you take the mission, since it will give you 1,5k for completing the dungeon!!
The smiting monk (hero) setup
Hero attributes and skills

Template code : OwQUQEH/WoF3pkpUmhke4LfA
- Blood is Power, 10 seconds +3 energy regen. For the 600 to regain energy after a battle
- Signet of Devotion, a self heal for the smiter since reversal of dmg can kill him, also te be used as heal for the 600 after a battle
- Blessed Signet, the energy gain for the smiter
- Rebirth, in case the 600 dies
- Vital Blessing, increasing the 600 monk's health for him to really become a 600 (maintain at all times on the 600)
- Life Attunement, increasing the healing the 600 monk receives when using his skills (maintain at all times on the 600)
- Retribution, for damaging the foes who attack the 600 monk (maintain at all times on the 600)
- Holy Wrath, for damaging the foes who attack the 600 monk even more. (maintain at all times on the 600)
!! Be sure to cast Retribution on the 600 monk first, after that cast Holy Wrath. So the foes' skill (RoD)*Reversal of Damage* will be triggered by *Retribution* making sure the smiting monk receives less damage from RoD !!
Armor/Rune setup
-Rune of Superior Protection
-Rune of Superior Smiting Prayers
-Rune of Minor Divine Favor
-Scalp Design of Smiting Prayers, for the rest any armor
-For the rest take Radiant Insigns, and Runes of Attunement
The 600 monk setup
Attributes and Skills

Template code: OwUTMmHD55uqFrHRkIg8QfAQAA
- Shield of Absorption, damage reduction of 5 each time you get hit for 7 seconds
- Spirit Bond, gain around 110 health every time you receive more as 60 damage from an attack. Lasts 8 seconds or 10 attacks/spells. ( !! This is your main/only healing skill during fights, don't let it get interrupted, keep it active !! )
- Protective Spirit, you can not lose more as 10% from every attack or spell
- Spellbreaker, enemy spells against you fail, for 17 seconds.
- Mantra of resolve, to prevent you being interrupted while activating one of your skills
- Balthazar's Spirit, to gain energy from every attack against you (maintain at all times on the 600)
- Essence Bond, to gain energy from every attack against you (maintain at all times on the 600)
- Blessed Aura, to make the enchants you use on yourself last longer, like spellbreaker and the other skills described above. (maintain at all times on the 600)
Inside Cathedral of Flames HM
When arriving in the first level always be sure to talk to the beacon of Droknar, for your deldrimor title track.. You will get loads of kills, so lots of deldrimor points.. I tend to forget it sometimes.. Or keep the beacon of Droknar as my target, and accidently cast all my enchants on the beacon instead of myself... Every time I did that, I noticed by getting slayed in about 2 seconds by the first groups of undead..
Several groups of foes will be seen inside the cathedral,
Groups of undead,

they will require you to use your Mantra of Resolve -> Spellbreaker -> Protective Spirit *BEFORE THEY GET IN YOUR AGGRO BUBBLE*. And after these 3 skills you need to keep up Shield of Absorption (for the damage reduction) and Spirit bond for your healing.
- Crypt Ghouls and Crypt Slashers are warrior / dervishes
- Crypt Wraiths, are mesmers you need your spellbreaker for these one's. Otherwise u will be interrupted like crazy. Spellbreaker needed.
- Crypt Banshees, are smiting monks, who have the dangerous skill reversal of damage, killing the smiter if it is being used too much by them.. Be sure to take a 2nd hero, or other healing from party members with you, when taking on several of these. Spellbreaker needed.
- Ash Phantoms, are ritualists. Generating the most irritating spirits of bloodsong..
- Shock Phantoms, are air elementalists.
Groups of charr
they will require you to use your Mantra of Resolve -> Spellbreaker -> Protective Spirit *BEFORE THEY GET IN YOUR AGGRO BUBBLE*. And after these 3 skills you need to keep up Shield of Absorption (for the damage reduction) and Spirit bond for your healing.
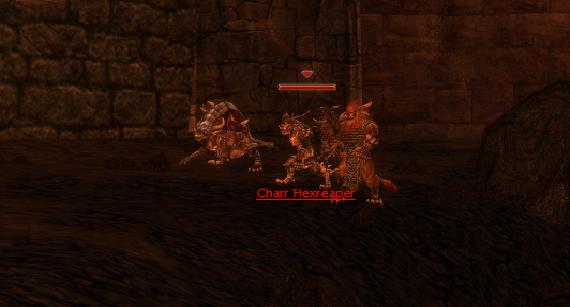
- Charr Hexreapers, are degen necromancers, Spellbreaker needed
- Charr Dominators, are mesmers capable of interrupting you so much.. Spellbreaker needed
- Charr Menders, are monks, and hardest to kill since they tend to heal themselve too much..
- Charr Blademasters and Axemasters are axe/sword warriors
- Charr Seekers , are rangers
Groups of floating weapon thingies
They will only require you to use Mantra of Resolve -> Protective Spirit *BEFORE THEY GET IN YOUR AGGRO BUBBLE*. And after these 2 skills you need to keep up Shield of Absorption (for the damage reduction) and Spirit bond for your healing.
Cathedral of flames Level 1

When entering the dungeon, first talk to the beacon of dronkar. When having done that, cast all the enchants on the 600 monk. From the start you will see 2 groups of undead, you can take on both groups at once when getting the extra healing for your smiting monk from other teammates or hero's.
Taking the north-west path around the lava will bring you to a group of charr. Most of the times it is 1 Charr Axemaster roaming around by himself. And a group of Charr most of the times containing a Domintator, a Hexreaper and a Flameshielder.
note: Sometimes the Charr will get into battle with the group of undead located further north.
But let's suppose you killed the Char yourself and head on to the next group of undead. At the place where you kill these undead, you can safely park your hero's when clearing the other group of undead inside the hallway. And the group of Charr north-east in front of the hallway. When aggro-ing the Charr and Undead together at the same time, they will also kill eachother, thus being bad for your drops... Keep them divided as much as you can, unless you are dealing with a lonely charr mender, healing himself all the times... I'll come back on this Charr Mender subject later..
After killing the undead in the hallway, you will see another group of undead, northeast from your position, guarding the entrance to the big hall.

When entering the big hall, you can see a group of green dots on your radar. north-west from your position. Don't even think of them being friendly npc's.. They will turn to red dots as soon as you get close enough. It's Faze Magekiller, one of the hardest bosses in CoF if you ask me.. You know the drill, keep them just outise your aggro, then use Mantra of Resolve -> Spellbreaker -> aggro Faze and his group -> Protective Spirit -> Spirit Bond -> Shield of Aborption. Then keep on renewing spirit bond and Shield of Absorption. When Shield of Absorption is running out cast Spirit bond first, then renew Shield of Aborption, after that cast Spirit Bond again.

** !! Another IMPORTANT thing, near Faze Magekiller is a huge fireplace, be sure not to let your monk hero's stand too close to that !! **
When killed Faze Magekiller & this gang, you will get a dungeon key and you can also check the big hall in the north east for hidden treasures... Groups of Charr Dominators/Hexreapers/Flameshielders roam those area's. So be sure to watch their moves..
Behind Faze Magekiller is the door to the lvl 1 boss, in the hallway to the next room you can see 2 groups of undead.. 1 group is standing still, the other group of undead is walking back and forward through the hallway. When entering the hallway and coming close to the beacon of droknar, then the group of undead which was standing still will come charing at you too.. So be prepared to face 2 groups of undead, or you need to lure them and take them group by group..
This is certainly 1 place you do not want to die. Since rezz will almost be impossible.. When you get respawned it will be in the middle of the group of undead again.. Leaving you with no time to cast your enchants... They will kick your ass time after time.. So be sure NOT TO DIE, in this spot..
After killing the 2 groups of undead in the hallway you will end up in a big hall.. With 2 groups of undead, the boss of lvl 1 *the keeper* and his minions. And the portal to lvl 2 behind the keeper.. Kill the 2 groups of undead before you take on the keeper..
After killing the keeper you will notice 2 groups will spawn.. 6 undead in total of which 2 are always Shock Phantoms
The other 4 undead are melee.. So you shouldn't have too much problems defeating these undead.. This chamber can also contain a hidden treasure, so be sure to use your LoD here too..

End of lvl 1

In the beginning of the 2nd level u will stand near to a beacon of droknar.. When looking downhill you will see 1 lonely charr..
Further behind the lonely charr you will see 2 patrolling groups of undead.. With proper timing you can engage both groups at once. Killing most of them within the duration of 1 spellbreaker.. Be sure to keep the healing fixed on your smiting monk, as these 2 groups can contain lots of Crypt Banshee's using their reversal of damage on your poor smiter. My mate who was a smiting monk at some time, he told me he got hit over 47 times by reversal of damage. No smiting monk can survive that without being healed..
After you have dealt with the 2 groups of undead you will follow the route in a southward direction. On your radar you will see a few green dots appear which turn red when coming closer.. This is a group of Char. This group can contain a charr mender, if this is the case, then let them be and focus on the upcoming group of enchanted weapons. This group of enchanted weapons is patrolling the hallway, before you enter the next room which is filled with poison gas clouds and other gas traps.
Just using the skills : Mantra of Resolve -> Protective Spirit -> Spirit bond -> Shield of Absorption -> Spirit bond again.
After this combo keep up your Spirit bond and Shield of Absorption, then u should be fine batteling those enchanted weapons.
When finished off the 2 groups of enchanted weapons you will be somewhere inside the poison gas trapped hall. Inside this room are popup enemies.. Be sure to know about where they spawn, as otherwise you can be in a big surprise the first few times.. Then you will learn about it quickly enough for sure.. This group of undead will spawn in the middle, between the different gas traps..
At the end of the room you will also see another group of enchanted weapons, defeat them as described above. And I did not try it yet, and I will not advise it, to take on this group of enchanted weapons, and the undead at the same time. Since in the small time you are vulnerable (when Spirit Bond and/or Shield of absorption runs out) they can do considerable damage in a small amount of time. Especially if you are running in starter armor.
After killing the enchanted weapons in the gas chamber, you will get into the next room. This room will have several huge skulls and things hanging from the roof, spitting out balls of fire which will fall and burn anybody below it. On the left you will see a poison arrow trap. When you activate this trap, another group of undead will pop up in this room. Aside from the group of undead already patrolling this room. If you don't want to aggro 2 groups, just stay to your right, and only engage the group of patrolling undead to the east.
When killed the undead to the east your path will go south, towards Tyndrr Flamecaller, he will give the dungeon key to enter the boss room of lvl 2.
If his group contains a charr mender, then it can happen the charr mender will outheal your dmg.. If that is the case then grab the dungeon key, run into the next room. When entering the next room you will see the group of plague zombies charging at you, now run back again towards the Charr Mender.. Run past the char mender back to your smiting monk's position, and the plague zombies which were following you will kill the Charr Mender, making the passage safe for your smiting monk, after you slay the plague zombies and Vraxx the Condemned.
In the center of the hallway, where once the ele boss Tyndrr Flamecaller stood, you can go 3 ways.. left and right you will have lava, alot of times inside the lava will be hidden chests which can be found with Light of Deldrimor.. But beware there are spiders guarding both patches of lava.. Eventually you will have to enter the room to the south-east, where the plague zombies came from.. In this room you will have 2 groups of undead, 1 group of enchanted weapons and the lvl 2 boss called The Master.. I normally take on both groups of undead first, after that I take the group of enchanted weapon, finishing the room with the lvl 2 boss.. This room can also contain hidden treasures.
Killing the master's group of minions you use the same skill chain as for all the undead you encounter. Mantra of Resolve -> Spellbreaker -> Spirit bond -> Shield of Absorption. Then it's just a matter of keeping up Spirit bond and Shield of Absorption untill they're all dead.
I've decided to make a Cathedral of flames guide on how to farm this Dungeon.
I'll bring up things like the builds, pictures, and other stuff so all of us would be able to farm this place.
And also earn some extra cash by taking along other players.. (you can easily ask 1,5k - 2k a person)
6x1,5k =9k
6x2k = 12k
Just for taking the people along
When planning on going solo, you can expect to get around 5-8k a run. Including the 1,5k mission reward you can collect at the merchant *Gron Fierceclaw*. From him you should also get the mission called *Temple of the Damned*
!!ALWAYS be sure you take the mission, since it will give you 1,5k for completing the dungeon!!
The smiting monk (hero) setup
Hero attributes and skills
Template code : OwQUQEH/WoF3pkpUmhke4LfA
- Blood is Power, 10 seconds +3 energy regen. For the 600 to regain energy after a battle
- Signet of Devotion, a self heal for the smiter since reversal of dmg can kill him, also te be used as heal for the 600 after a battle
- Blessed Signet, the energy gain for the smiter
- Rebirth, in case the 600 dies
- Vital Blessing, increasing the 600 monk's health for him to really become a 600
- Life Attunement, increasing the healing the 600 monk receives when using his skills (maintain at all times on the 600)
- Retribution, for damaging the foes who attack the 600 monk (maintain at all times on the 600)
- Holy Wrath, for damaging the foes who attack the 600 monk even more. (maintain at all times on the 600)
!! Be sure to cast Retribution on the 600 monk first, after that cast Holy Wrath. So the foes' skill (RoD)*Reversal of Damage* will be triggered by *Retribution* making sure the smiting monk receives less damage from RoD !!
Armor/Rune setup
-Rune of Superior Protection
-Rune of Superior Smiting Prayers
-Rune of Minor Divine Favor
-Scalp Design of Smiting Prayers, for the rest any armor
-For the rest take Radiant Insigns, and Runes of Attunement
The 600 monk setup
Attributes and Skills
Template code: OwUTMmHD55uqFrHRkIg8QfAQAA
- Shield of Absorption, damage reduction of 5 each time you get hit for 7 seconds
- Spirit Bond, gain around 110 health every time you receive more as 60 damage from an attack. Lasts 8 seconds or 10 attacks/spells. ( !! This is your main/only healing skill during fights, don't let it get interrupted, keep it active !! )
- Protective Spirit, you can not lose more as 10% from every attack or spell
- Spellbreaker, enemy spells against you fail, for 17 seconds.
- Mantra of resolve, to prevent you being interrupted while activating one of your skills
- Balthazar's Spirit, to gain energy from every attack against you (maintain at all times on the 600)
- Essence Bond, to gain energy from every attack against you (maintain at all times on the 600)
- Blessed Aura, to make the enchants you use on yourself last longer, like spellbreaker and the other skills described above. (maintain at all times on the 600)
Inside Cathedral of Flames HM
When arriving in the first level always be sure to talk to the beacon of Droknar, for your deldrimor title track.. You will get loads of kills, so lots of deldrimor points..
Several groups of foes will be seen inside the cathedral,
Groups of undead,
they will require you to use your Mantra of Resolve -> Spellbreaker -> Protective Spirit *BEFORE THEY GET IN YOUR AGGRO BUBBLE*. And after these 3 skills you need to keep up Shield of Absorption (for the damage reduction) and Spirit bond for your healing.
- Crypt Ghouls and Crypt Slashers are warrior / dervishes
- Crypt Wraiths, are mesmers you need your spellbreaker for these one's. Otherwise u will be interrupted like crazy. Spellbreaker needed.
- Crypt Banshees, are smiting monks, who have the dangerous skill reversal of damage, killing the smiter if it is being used too much by them.. Be sure to take a 2nd hero, or other healing from party members with you, when taking on several of these. Spellbreaker needed.
- Ash Phantoms, are ritualists. Generating the most irritating spirits of bloodsong..
- Shock Phantoms, are air elementalists.
Groups of charr
they will require you to use your Mantra of Resolve -> Spellbreaker -> Protective Spirit *BEFORE THEY GET IN YOUR AGGRO BUBBLE*. And after these 3 skills you need to keep up Shield of Absorption (for the damage reduction) and Spirit bond for your healing.
- Charr Hexreapers, are degen necromancers, Spellbreaker needed
- Charr Dominators, are mesmers capable of interrupting you so much.. Spellbreaker needed
- Charr Menders, are monks, and hardest to kill since they tend to heal themselve too much..
- Charr Blademasters and Axemasters are axe/sword warriors
- Charr Seekers , are rangers
Groups of floating weapon thingies
They will only require you to use Mantra of Resolve -> Protective Spirit *BEFORE THEY GET IN YOUR AGGRO BUBBLE*. And after these 2 skills you need to keep up Shield of Absorption (for the damage reduction) and Spirit bond for your healing.
Cathedral of flames Level 1
When entering the dungeon, first talk to the beacon of dronkar. When having done that, cast all the enchants on the 600 monk. From the start you will see 2 groups of undead, you can take on both groups at once when getting the extra healing for your smiting monk from other teammates or hero's.
Taking the north-west path around the lava will bring you to a group of charr. Most of the times it is 1 Charr Axemaster roaming around by himself. And a group of Charr most of the times containing a Domintator, a Hexreaper and a Flameshielder.
note: Sometimes the Charr will get into battle with the group of undead located further north.
But let's suppose you killed the Char yourself and head on to the next group of undead. At the place where you kill these undead, you can safely park your hero's when clearing the other group of undead inside the hallway. And the group of Charr north-east in front of the hallway. When aggro-ing the Charr and Undead together at the same time, they will also kill eachother, thus being bad for your drops... Keep them divided as much as you can, unless you are dealing with a lonely charr mender, healing himself all the times... I'll come back on this Charr Mender subject later..
After killing the undead in the hallway, you will see another group of undead, northeast from your position, guarding the entrance to the big hall.
When entering the big hall, you can see a group of green dots on your radar. north-west from your position. Don't even think of them being friendly npc's.. They will turn to red dots as soon as you get close enough.
** !! Another IMPORTANT thing, near Faze Magekiller is a huge fireplace, be sure not to let your monk hero's stand too close to that !! **
When killed Faze Magekiller & this gang, you will get a dungeon key and you can also check the big hall in the north east for hidden treasures... Groups of Charr Dominators/Hexreapers/Flameshielders roam those area's. So be sure to watch their moves..
Behind Faze Magekiller is the door to the lvl 1 boss, in the hallway to the next room you can see 2 groups of undead.. 1 group is standing still, the other group of undead is walking back and forward through the hallway. When entering the hallway and coming close to the beacon of droknar, then the group of undead which was standing still will come charing at you too.. So be prepared to face 2 groups of undead, or you need to lure them and take them group by group..
This is certainly 1 place you do not want to die. Since rezz will almost be impossible.. When you get respawned it will be in the middle of the group of undead again.. Leaving you with no time to cast your enchants... They will kick your ass time after time.. So be sure NOT TO DIE, in this spot..
After killing the 2 groups of undead in the hallway you will end up in a big hall.. With 2 groups of undead, the boss of lvl 1 *the keeper* and his minions. And the portal to lvl 2 behind the keeper.. Kill the 2 groups of undead before you take on the keeper..
After killing the keeper you will notice 2 groups will spawn.. 6 undead in total of which 2 are always Shock Phantoms
The other 4 undead are melee.. So you shouldn't have too much problems defeating these undead.. This chamber can also contain a hidden treasure, so be sure to use your LoD here too..
End of lvl 1
In the beginning of the 2nd level u will stand near to a beacon of droknar.. When looking downhill you will see 1 lonely charr..
Further behind the lonely charr you will see 2 patrolling groups of undead.. With proper timing you can engage both groups at once. Killing most of them within the duration of 1 spellbreaker.. Be sure to keep the healing fixed on your smiting monk, as these 2 groups can contain lots of Crypt Banshee's using their reversal of damage on your poor smiter. My mate who was a smiting monk at some time, he told me he got hit over 47 times by reversal of damage. No smiting monk can survive that without being healed..
After you have dealt with the 2 groups of undead you will follow the route in a southward direction. On your radar you will see a few green dots appear which turn red when coming closer.. This is a group of Char. This group can contain a charr mender, if this is the case, then let them be and focus on the upcoming group of enchanted weapons. This group of enchanted weapons is patrolling the hallway, before you enter the next room which is filled with poison gas clouds and other gas traps.
Just using the skills : Mantra of Resolve -> Protective Spirit -> Spirit bond -> Shield of Absorption -> Spirit bond again.
After this combo keep up your Spirit bond and Shield of Absorption, then u should be fine batteling those enchanted weapons.
When finished off the 2 groups of enchanted weapons you will be somewhere inside the poison gas trapped hall. Inside this room are popup enemies.. Be sure to know about where they spawn, as otherwise you can be in a big surprise the first few times..
At the end of the room you will also see another group of enchanted weapons, defeat them as described above. And I did not try it yet, and I will not advise it, to take on this group of enchanted weapons, and the undead at the same time. Since in the small time you are vulnerable (when Spirit Bond and/or Shield of absorption runs out) they can do considerable damage in a small amount of time. Especially if you are running in starter armor.
After killing the enchanted weapons in the gas chamber, you will get into the next room. This room will have several huge skulls and things hanging from the roof, spitting out balls of fire which will fall and burn anybody below it. On the left you will see a poison arrow trap. When you activate this trap, another group of undead will pop up in this room. Aside from the group of undead already patrolling this room. If you don't want to aggro 2 groups, just stay to your right, and only engage the group of patrolling undead to the east.
When killed the undead to the east your path will go south, towards Tyndrr Flamecaller, he will give the dungeon key to enter the boss room of lvl 2.
If his group contains a charr mender, then it can happen the charr mender will outheal your dmg.. If that is the case then grab the dungeon key, run into the next room. When entering the next room you will see the group of plague zombies charging at you, now run back again towards the Charr Mender.. Run past the char mender back to your smiting monk's position, and the plague zombies which were following you will kill the Charr Mender, making the passage safe for your smiting monk, after you slay the plague zombies and Vraxx the Condemned.
In the center of the hallway, where once the ele boss Tyndrr Flamecaller stood, you can go 3 ways.. left and right you will have lava, alot of times inside the lava will be hidden chests which can be found with Light of Deldrimor.. But beware there are spiders guarding both patches of lava.. Eventually you will have to enter the room to the south-east, where the plague zombies came from.. In this room you will have 2 groups of undead, 1 group of enchanted weapons and the lvl 2 boss called The Master.. I normally take on both groups of undead first, after that I take the group of enchanted weapon, finishing the room with the lvl 2 boss.. This room can also contain hidden treasures.
Killing the master's group of minions you use the same skill chain as for all the undead you encounter. Mantra of Resolve -> Spellbreaker -> Spirit bond -> Shield of Absorption. Then it's just a matter of keeping up Spirit bond and Shield of Absorption untill they're all dead.
End of lvl 2


Ayumi Nakashi- Officer

- Number of posts : 11
Age : 41
Location : Holland
Registration date : 2008-02-04
![]()
![]()
![]()

 Similar topics
» Farming Plans
» Kurzik Faction Farming
» Nightfall and Jujundu farming.
» UW (Urgoz Warren) Farming Builds
» Kurzik Faction Farming
» Nightfall and Jujundu farming.
» UW (Urgoz Warren) Farming Builds
Shadow of Gods :: Guild Wars 1 :: In-Game :: PvE :: Farming
Page 1 of 1
Permissions in this forum:
You cannot reply to topics in this forum|
|
|